
Fine detail work exposes every weakness in a pair of scissors. A blunt tip can crush silk threads, while uneven blades may leave ragged edges in satin stitch. For this guide, we examine seven Precision Embroidery Scissors designed for controlled cutting, close trimming, and delicate thread removal. The focus is practical: blade sharpness, tip alignment, handle comfort, balance, and performance across cotton, linen, silk, and metallic threads.
Trish Burr, an embroidery artist and author, has said, “Good tools make the work easier.” That principle matters here. A well-made pair should open smoothly, cut at the tip, and feel stable between your fingers. It should not force your wrist into an awkward angle. Small details matter.
Not every expensive model performs perfectly. Some scissors feel beautiful but struggle with thicker floss. Others cut sharply but have handles that tire the hand. I have also found that personal grip changes the experience. A compact tool may suit miniature motifs, while a longer blade may offer better control on broad outlines. That uncertainty deserves attention.
This selection compares seven leading options for stitchers who value accuracy over decoration. Each review considers real handling, edge performance, maintenance needs, and likely project use. The goal is not to crown one universal winner. It is to help you find the Precision Embroidery Scissors that match your stitches, materials, and working habits.
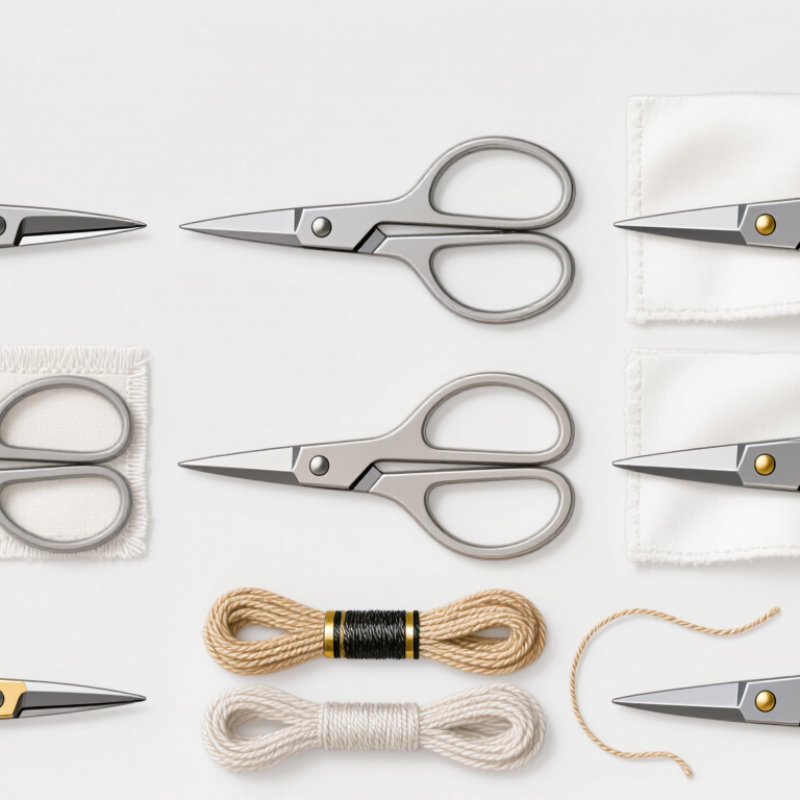
Precision embroidery scissors are ideal for fine detail work because their short, sharp blades offer controlled movement. They can reach tiny spaces between stitches without disturbing nearby threads. A narrow, pointed tip helps trim knots, loose ends, and small fabric sections accurately. The best pair should open smoothly and close without wobbling. This matters when one careless cut can damage several hours of stitching. In my sewing experience, a comfortable handle also improves control during repeated trimming. Small details demand steady hands.
Blade alignment is equally important. Hold the scissors against a light background and inspect the tips. They should meet evenly, without a visible gap. Stainless steel offers useful resistance to moisture, but it still needs careful storage. Wipe the blades after use and keep them closed in a dry case. I once ignored slight stiffness and forced the handles. The cut became uneven. That mistake reminded me that precision tools need patience, not pressure.
Tips: Test the scissors on scrap fabric before detailed work. Use the very tip for tiny cuts, but avoid twisting the blades. Keep embroidery scissors separate from paper-cutting tools. Paper can dull fine edges quickly. If your fingers feel strained, pause and adjust your grip. Even excellent scissors cannot correct rushed hand movements.
Choosing among the seven best precision embroidery scissors requires more than checking blade length. In hands-on stitching, I look for sharp, narrow blades that enter tight spaces without disturbing nearby threads. A pointed tip matters for cutting single strands, while smooth edges reduce fraying on silk, cotton, and metallic thread. Small handles can improve control, but they may feel uncomfortable during long sessions.
Compare the scissors’ steel quality, blade alignment, and closing action. The blades should meet evenly from the tip to the hinge. Test them on one loose thread, not a thick fabric bundle. A clean cut should need little pressure. Poor alignment often leaves a thread partly severed. That tiny problem becomes frustrating around satin stitches. It happened to me more than once.
Handle shape deserves equal attention. Finger holes should fit without forcing your knuckles inward. A balanced pair feels steady when trimming French knots or cutting close to a hoop. Protective caps help preserve the tip during storage. Weight also matters; overly light scissors can feel unstable, while heavy ones may tire the wrist. I prefer a firm hinge, though some users may find it too stiff. Personal comfort is easy to underestimate. Judge it after several minutes of careful trimming, not only during a quick shop test.
Key features to compare before choosing embroidery scissors
The ratings reflect practical priorities for fine detail work. Sharp pointed tips and smooth blade alignment support accurate thread cutting, while compact size, comfortable handles, corrosion resistance, and a protective cover improve control, durability, and safe storage.
For detailed stitching, the seven top precision embroidery scissors are not identical. Each serves a different cutting situation. Micro-tip scissors provide the cleanest access around tiny stitches. Curved-blade scissors help trim raised embroidery without scraping the fabric. Stork-style scissors offer narrow points and balanced control. Duckbill scissors protect nearby cloth during surface trimming. Serrated blades can grip slippery threads more securely. Spring-loaded scissors reduce hand strain during repeated snipping. Compact thread snips work well when speed matters more than deep reach.
In my sewing sessions, sharp points have mattered more than decorative handles. A good pair should close evenly, cut near the hinge, and remain comfortable after several minutes. Test the blades on cotton, silk, and stranded thread before trusting them with finished work. Silk exposes rough edges quickly. Tiny handles can improve accuracy, but they may tire larger hands. I still sometimes choose the wrong shape for a tight corner. That mistake taught me to match scissors with the stitch, not the project title. Look for stainless construction, a secure pivot, and blade tips that meet without a visible gap. Keep the scissors dry, wipe away thread dust, and reserve them for textiles. Even the finest pair will lose precision when forced through thick layers. Fine details punish haste.
Choosing embroidery scissors by appearance alone can cause frustrating mistakes. The right pair should match the stitch, thread, and fabric tension. In my own stitching, sharp fine-point scissors work best for satin stitch. Their narrow blades reach tight corners without disturbing nearby threads. They also help trim French-knot tails closely.
For cutwork and appliqué, curved-tip scissors offer better control. The rounded shape protects the fabric while the tips remove small sections cleanly. Duckbill scissors suit raised appliqué edges because their broad lower blade shields the base fabric.
For metallic thread, use a dedicated sharp pair. Metallic fibers can dull ordinary blades quickly. Small spring-action scissors reduce hand strain during long hours of needlework. A compact thread snip works well for quick trimming, but it may lack the precision needed for uneven edges.
Scissor length matters too. Blades around three inches feel balanced for detailed hand embroidery. Longer blades can remove more thread, yet they may feel clumsy near dense stitches. Keep each pair clean and dry, then close the blades after use. I once used general craft scissors on silk, and the rough cut forced me to redo an entire border. That mistake still influences my tool choices. Even expensive-looking scissors can disappoint when their tips do not meet perfectly. Test the final few millimeters before cutting valuable fabric.
Precision embroidery scissors reward careful maintenance, especially during fine detail work. Their narrow blades collect lint, thread fibers, and tiny traces of adhesive. After each project, I wipe the blades with a soft, dry cloth. I also inspect the hinge for stiffness before cutting delicate fabric.
Keep the scissors dry and store them in a protective sleeve or covered container. A small drop of suitable instrument oil at the hinge can prevent friction, but excess oil may stain fabric. Apply it sparingly, then open and close the handles several times. Wipe away every visible residue. Never use the scissors to cut paper, plastic, or wire. Those materials can damage the sharp edges. I learned this after ruining a pair during a rushed repair.
Tips: Clean before storage. Oil the hinge lightly. Keep blades closed. Avoid dropping the scissors. Test the cutting action on scrap thread before returning to embroidery. If the blades feel rough, do not force them through fabric. Professional sharpening is safer than aggressive home filing. I sometimes postpone maintenance when a project is nearly finished, but that habit creates avoidable wear. A short cleaning routine protects alignment, reduces pulling, and helps preserve precise cutting performance.
Choose sharp, narrow blades with precise points. They should enter tight spaces without disturbing nearby threads. Smooth edges reduce fraying on silk, cotton, and metallic thread. Test one loose thread before cutting valuable fabric.
Close the blades slowly and watch the final few millimeters. They should meet evenly from the tip to the hinge. A clean cut should need little pressure. If one thread remains partly attached, the alignment may be poor.
Fine-point scissors suit satin stitch and French-knot tails. Their narrow tips reach crowded corners. They help trim small thread ends closely. Use gentle pressure.
Curved-tip scissors can improve control around small fabric sections. Their rounded shape helps protect the base fabric. Broad lower blades are useful for raised appliqué edges. Still, practice on scrap fabric first.
A separate sharp pair is helpful for metallic thread. Metallic fibers can dull ordinary blades more quickly. Keep those scissors away from paper and wire. I learned that lesson late.
Finger holes should fit without pressing your knuckles inward. Balanced scissors feel steadier near a hoop or French knot. Very light scissors may feel unstable. Heavy ones can tire your wrist. Comfort changes after several minutes.
Blades around three inches often feel balanced for detailed work. Longer blades cut more thread but may feel clumsy near dense stitches. Short blades offer control in narrow spaces. It depends on your hand.
Wipe the blades with a soft, dry cloth after each project. Remove lint and thread fibers near the hinge. Keep the scissors dry and closed. Store them in a sleeve or covered container.
Apply one small drop of suitable instrument oil to the hinge. Open and close the handles gently, then remove all visible residue. Excess oil may stain fabric. Professional sharpening is safer than aggressive filing. I sometimes delay maintenance, regrettably.
This guide explores what makes Precision Embroidery Scissors essential for fine detail work, from sharply pointed blades and smooth cutting action to comfortable handles and dependable control. It explains the key features to compare before choosing a pair, including blade length, tip design, construction quality, balance, and suitability for delicate fabrics and threads. You’ll also find an overview of seven top options for detailed stitching, selected to represent different preferences and working styles without focusing on brand names.
The article further explains how to match scissors with embroidery techniques such as appliqué, thread trimming, needlework, and close-detail stitching. Finally, it provides practical care and maintenance advice, including safe storage, regular cleaning, careful handling, and occasional lubrication when appropriate. With the right pair and consistent upkeep, stitchers can achieve cleaner cuts, greater accuracy, and more comfortable crafting sessions.