
[email protected] +92 333 8625441
0%

Choosing the right Cuticle Pusher Remover Tools can make nail care safer, cleaner, and more comfortable. The wrong tool may scratch the nail plate, tear living skin, or create tiny openings around the cuticle. A careful choice begins with purpose. Are you preparing natural nails, removing softened cuticle residue, or working with gel products? Each task needs a different edge and level of control.

In professional nail care, stainless steel tools are often preferred because they resist rust and tolerate proper cleaning. However, material alone does not guarantee quality. A rounded pusher edge should glide gently along the nail without digging into the surrounding skin. The handle should feel stable between your fingers, even when your hands are slightly damp. Small details matter. A narrow tip may reach sidewalls, while a wider end can manage larger nail surfaces more efficiently. Disposable orange wood sticks may suit occasional home use, but they require careful handling and should not be shared.

I have learned that a polished appearance can be misleading. A tool may look premium but still have rough edges or poor balance. Check the finish under bright light. Move the tool across a clean fingertip, not directly against sensitive tissue. It should feel smooth, not sharp. Clean and disinfect reusable tools according to the manufacturer’s instructions, and never ignore pain, redness, or bleeding. Stop when needed. Cuticles protect the nail area, so removal should be minimal rather than aggressive. With realistic expectations, informed inspection, and gentle technique, you can select tools that support safer, more consistent nail care.

How to Choose Cuticle Pusher Remover Tools?

Understanding Cuticle Pusher and Remover Tool Types

How to Choose Cuticle Pusher Remover Tools?
Understanding Cuticle Pusher and Remover Tool Types

Cuticle tools usually fall into two groups: pushers and removers. A stainless-steel pusher often has a broad, curved end for gently moving softened cuticle back. Its narrower end can clear residue near the nail edge, but it needs a light touch. Wooden sticks are softer and disposable, making them a practical choice for occasional home care. They can splinter, though, so check the tip before use.

Removers may mean a liquid or gel that softens excess dead cuticle, or a tool designed to lift loosened material. These products are not interchangeable. A pusher moves tissue; a remover product helps soften it. Follow the product directions, and avoid scraping tender skin. Stop if the area stings or looks red. Small, but important.

Choose a tool that feels steady between your fingers and matches your nail shape. Rounded edges are generally easier to control than sharp ones. Clean reusable metal tools before and after use, and keep them dry. One detail is easy to miss: more pressure does not mean a cleaner result. Even careful routines can leave a little dry skin behind, and that is often better than pushing too far.

How to Choose Cuticle Pusher Remover Tools? - Understanding Cuticle Pusher and Remover Tool Types

Tool Type Typical Material or Design Main Purpose Best Suited For Key Considerations
Flat or rounded-end pusher Usually stainless steel; one end has a flat or gently curved blade Gently moves softened cuticle tissue away from the nail plate Routine home or professional manicures when controlled pressure is possible Choose a smooth, rounded edge. Use at a shallow angle and avoid scraping forcefully.
Spoon-shaped pusher Often stainless steel, with a shallow curved end sized to the nail Follows the curve of the nail plate while pushing back softened cuticle People who prefer a curved contact surface for larger nail plates The curve should fit without digging into the surrounding skin; use light pressure.
Dual-ended pusher Typically stainless steel, with a broad pusher on one end and a narrow end on the other Provides different working shapes for the nail plate and smaller areas near the sidewalls Users who want one reusable tool for several nail shapes and sizes Inspect both ends for sharp burrs. Clean and disinfect reusable tools according to their care instructions.
Wooden orangewood stick Smooth, tapered wood; commonly intended for single-person use Gently pushes back softened cuticle or helps clean around the nail edge Beginners and people who prefer a non-metal contact surface Use a fresh, smooth stick and do not share it. Discard it if it splinters or becomes rough.
Plastic or silicone pusher Molded plastic or flexible silicone, often with a rounded tip Moves softened cuticle with a softer-feeling contact surface than a rigid metal edge Occasional home use or users who find metal tools uncomfortable Check that the tip is intact and easy to clean; replace it if cracked, warped, or damaged.
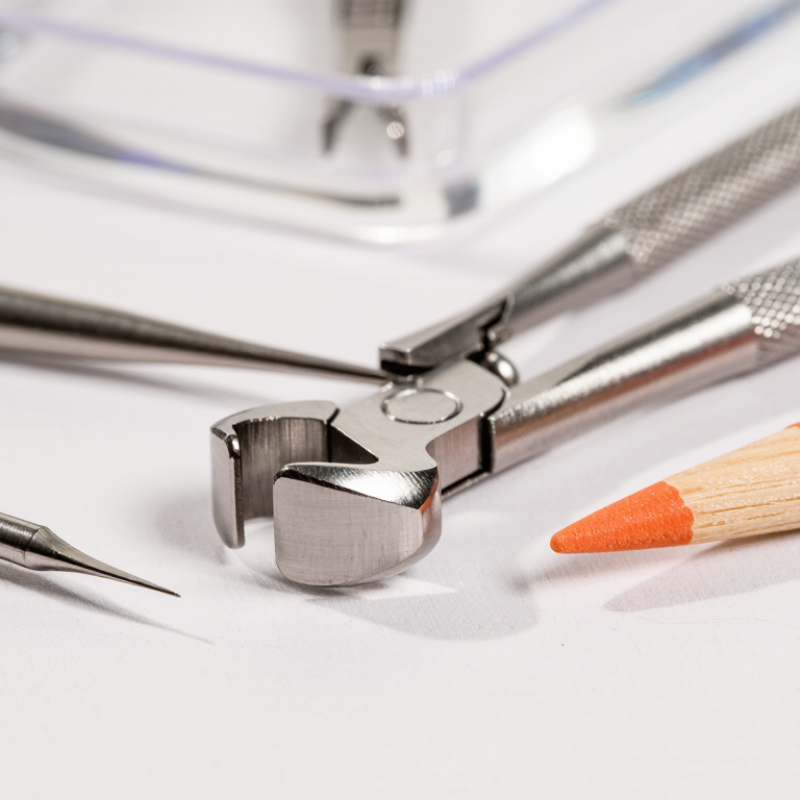
Cuticle nipper Small, sharpened stainless-steel jaws with a spring or hinged handle Trims loose hangnails or clearly detached dead skin; it is not a pusher Careful users or trained nail professionals addressing small, loose pieces of skin Do not cut living skin or cut the protective seal around the nail. Avoid use on inflamed or damaged skin.
Cuticle remover liquid or gel Topical product; formulations vary and may use alkaline ingredients or other softening agents Softens or loosens excess dead cuticle tissue so it can be gently moved away Users who want to soften dry cuticle before using a pusher Follow the product label, limit contact time as directed, rinse as instructed, and avoid broken or irritated skin.

Selection tip: For basic home care, a smooth rounded pusher or a fresh orangewood stick is usually sufficient. Soften the cuticle first, work gently, and stop if you feel pain or see bleeding. The cuticle helps protect the area around the nail, so avoid cutting it.

Comparing Materials, Shapes, and Handle Designs

How to Choose Cuticle Pusher Remover Tools?

Material affects control, hygiene, and service life. Stainless steel is durable, easy to clean, and less likely to splinter. It should feel solid, not heavy enough to tire your wrist. Wooden pushers feel warm and gentle, but they are usually better for limited or single-use applications. Plastic tools can be comfortable, although some bend during firm work. I once chose a lightweight tool because it looked convenient. It flexed too much around the nail fold. That choice was not entirely right.

Shape matters more than appearance. A rounded spoon end can follow the natural curve of the nail plate. A slanted edge reaches narrow sidewalls with less wrist twisting. A pointed end may remove small deposits, but it demands careful pressure. Never force the tool under attached skin. Healthy cuticles are living tissue, not excess material to scrape away. Stop if the area becomes painful, red, or damaged.

Handle design changes accuracy during longer sessions. A textured metal grip helps prevent slipping when hands are moisturized. Silicone sleeves may reduce pressure on finger joints. A wider handle often suits beginners, while a slim handle can give experienced users finer control. Test the tool against your palm. Does it stay steady? Can you rotate it without squeezing hard? Tool maintenance also matters. Clean and disinfect reusable instruments according to professional guidance, then inspect edges for burrs or corrosion. Small defects can create surprisingly rough contact.

The chart compares common cuticle pusher remover designs using practical ratings from 1 to 5. Stainless steel generally offers the strongest durability and corrosion resistance, glass provides a smooth and precise edge, and plastic is lightweight but less durable. Wider ergonomic handles improve grip comfort and control during use.

Choosing Tools for Different Nail and Cuticle Needs

How to Choose Cuticle Pusher Remover Tools?

Choosing Tools for Different Nail and Cuticle Needs

Healthy nail care starts with identifying what the cuticle needs. A soft, thin cuticle usually responds to a rounded stainless-steel pusher. Its curved edge follows the nail plate without digging into skin. For dry, adherent tissue, use a flat pusher after a short soak or cuticle-softening treatment. Do not force it. A wooden stick can suit sensitive skin, but it should be smooth and single-use.

Different nails require different control. Short nails benefit from a narrow pusher that reaches sidewalls without scraping surrounding skin. Wide nail plates may feel easier with a broader, gently curved tool. For small hangnails, precise nippers can remove loose dead tissue, not living skin. Keep the blades sharp and disinfect reusable tools according to professional sanitation guidance. Dull edges often cause pulling, uneven cuts, and tiny tears.

I have found that pressure matters more than speed. Work under bright light, with clean, dry hands, and stop when the area feels tender. Never share tools without proper cleaning. If redness, swelling, bleeding, or persistent pain appears, pause home care and seek a qualified medical professional. My own technique is not perfect; I sometimes overwork one sidewall when rushing. Checking the skin from several angles helps reveal that mistake before it becomes irritation.

Checking Safety, Comfort, and Ease of Use

How to Choose Cuticle Pusher Remover Tools?

Checking Safety, Comfort, and Ease of Use

A safe cuticle pusher should have a smooth, rounded edge. Sharp corners can scratch the nail plate or break delicate skin. The American Academy of Dermatology advises leaving cuticles intact because they help block bacteria and fungi. Avoid tools that forcefully scrape, cut, or remove living tissue. Gentle pressure is enough. Sometimes, less work gives a cleaner result.

Comfort matters. Choose a handle that feels stable between wet fingers, with a grip that does not require squeezing. Stainless steel is practical when the surface is seamless and easy to clean. Check for rust, rough welds, and loose attachments before every use. I once assumed a heavier tool meant better control. It did not. Weight without balance quickly caused hand fatigue. Test the tool on a practice surface first.

Clean handling is not optional. The World Health Organization’s 2022 global infection report found healthcare-associated infections affect about 7 in 100 patients in high-income countries and 15 in 100 in low- and middle-income countries. Salon work differs, but the contamination lesson remains relevant. Follow the manufacturer’s cleaning instructions, and never share an uncleaned tool. Disposable removers should be discarded after use. Reusable tools need thorough washing, disinfection, and complete drying. If the skin feels hot, painful, or unusually red, stop. A simple tool should not create a complicated problem.

Cleaning, Storing, and Replacing Cuticle Tools

How to Choose Cuticle Pusher Remover Tools?

A reliable cuticle tool should feel balanced, smooth, and easy to control. Choose corrosion-resistant stainless steel with rounded edges and a firm handle. Avoid tools with rough seams, deep scratches, or loose joints. These defects can trap residue and irritate delicate skin. In daily salon work, I clean tools immediately after use, not at closing time. Dried tissue becomes stubborn quickly. The CDC’s Guideline for Disinfection and Sterilization stresses that cleaning must occur before disinfection. The WHO Global Report on Infection Prevention and Control reports that healthcare-associated infections affect about 7% of patients in high-income countries. Salon tools are different, but the contamination lesson still matters.

Tips: Rinse visible debris under warm water, then scrub every groove with a small brush. Use a disinfectant approved for the tool material and follow its contact time. More liquid does not mean better disinfection. Dry each instrument completely before storing it in a clean, covered container. Do not leave tools soaking overnight unless the manufacturer permits it. Moisture can damage hinges and create dull, stained surfaces. Keep clean and used tools physically separate.

Replace a cuticle pusher when its edge becomes sharp, bent, pitted, or difficult to clean. Discard it sooner after dropping it onto a contaminated floor. Tool life depends on material, cleaning chemicals, and usage frequency. I used to judge replacement by appearance alone. That was too simple. A tool may look acceptable but still hold residue inside a joint. Review your cleaning log monthly, and replace uncertain tools rather than guessing.

FAQS

Which material is best for a cuticle pusher?

Stainless steel is durable, easy to clean, and less likely to splinter. Choose a balanced tool, not simply a heavy one. I learned that late.

Which tool shape offers better control?

A rounded spoon end follows the nail’s curve. A slanted edge can reach narrow sidewalls. Pointed ends need extra care.

What handle design feels comfortable?

Pick a grip that stays steady between damp fingers. Textured surfaces or silicone sleeves may reduce slipping. Test it in your palm.

How much pressure should I use?

Use gentle pressure on the nail plate. Never force the tool beneath attached skin. Stop if skin becomes painful, red, or damaged.

How can I check a tool before use?

Look for rust, rough seams, sharp corners, and loose joints. Try the tool on a practice surface first. Small flaws matter.

How should reusable cuticle tools be cleaned?

Rinse visible debris, then scrub grooves with a small brush. Disinfect according to the tool’s instructions and observe the full contact time. Dry it completely.

How should cuticle tools be stored?

Keep clean tools in a covered container, separate from used ones. Avoid overnight soaking unless the instructions allow it. Moisture can leave stains.

When should I replace a cuticle pusher?

Replace it if the edge is bent, pitted, sharp, or difficult to clean. I once judged by appearance alone. That was too simple.

Conclusion

Choosing the right Cuticle Pusher Remover Tools starts with understanding the differences between pushers, removers, nippers, and combination designs. Consider the tool’s material, shape, and handle style to find a balance of durability, precision, and comfort. Stainless steel tools are generally sturdy and easy to sanitize, while softer or cushioned handles may provide better control during extended use. The best choice also depends on your nail and cuticle needs, including delicate skin, thick cuticles, or detailed nail care.

Safety and ease of use should always be priorities. Select tools with smooth edges, comfortable grips, and a size that allows controlled movements without excessive pressure. After each use, clean and thoroughly dry the tools before storing them in a clean, protected container. Regular inspection is important because dull, damaged, or rusted tools can reduce performance and cause discomfort. Replacing worn tools helps maintain hygienic, precise, and comfortable nail care.

Clara

Clara

Clara is a professional marketing specialist who brings a deep understanding of the company’s products and the needs of the people who use them. Through her regular blog articles, she turns product knowledge into clear, practical information, helping readers understand key features, compare......